Budget-Friendly Safety Gear for Home Organization for Safer Projects (Winter, December, Christmas)
)
Tools Needed
Materials Needed
Safety Tips
- Always wear safety gear even for quick tasks to prevent injuries.
- Use safety goggles to protect eyes from dust and debris.
- Wear gloves with good grip to avoid cuts and scrapes.
- Use a face mask to filter dust, especially with old materials.
- Wear steel-toed boots to protect feet from heavy falling objects.
- Use ear protection when operating power tools.
- Keep a stocked first aid kit nearby for minor accidents.
- Ensure shelves and hooks are not overloaded to prevent collapses.
Before You Start / What to Know Up Front
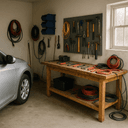
Hey there, fellow DIYers! If you’re anything like me, winter is not only a time for warm drinks and cozy blankets but also a fantastic opportunity to tackle those home organization projects you’ve been putting off. But here’s the catch: organizing your space safely can be a challenge, especially when you’re working with tools, storage solutions, and sometimes heavy items that can slip or fall.
In my early DIY days, I often overlooked the importance of safety gear. I remember trying to organize my garage without gloves or safety goggles and ended up with a nasty splinter and a scratched cornea from a rogue shelf bracket. Trust me, it’s not a fun experience! That’s why I’m here to help you navigate the world of budget-friendly safety gear for all your home organization needs this winter.
This guide is geared towards DIYers looking to optimize their home, garage, or workspace layout without breaking the bank. We’ll cover everything from safety gear essentials to step-by-step organization methods. By the end, you’ll be ready to tackle your projects with confidence and a clear plan!
Method Overview
The approach we’re taking centers around a few key principles: safety, organization, and efficiency. We’ll focus on using affordable safety gear that allows you to work smart without sacrificing protection. This method is effective because it combines the best practices of organizing your space while ensuring you’re not putting yourself at risk.
Now, when is this approach NOT a good fit? If you’re dealing with particularly hazardous materials, like chemicals or heavy machinery, you may need specialized safety gear that goes beyond what we’ll cover here. Always assess your individual project needs and adjust accordingly.
Deep Step Detail
Let’s get into the nitty-gritty of organizing your space safely. Here’s a step-by-step guide to ensure you’re fully equipped and ready to tackle your projects:
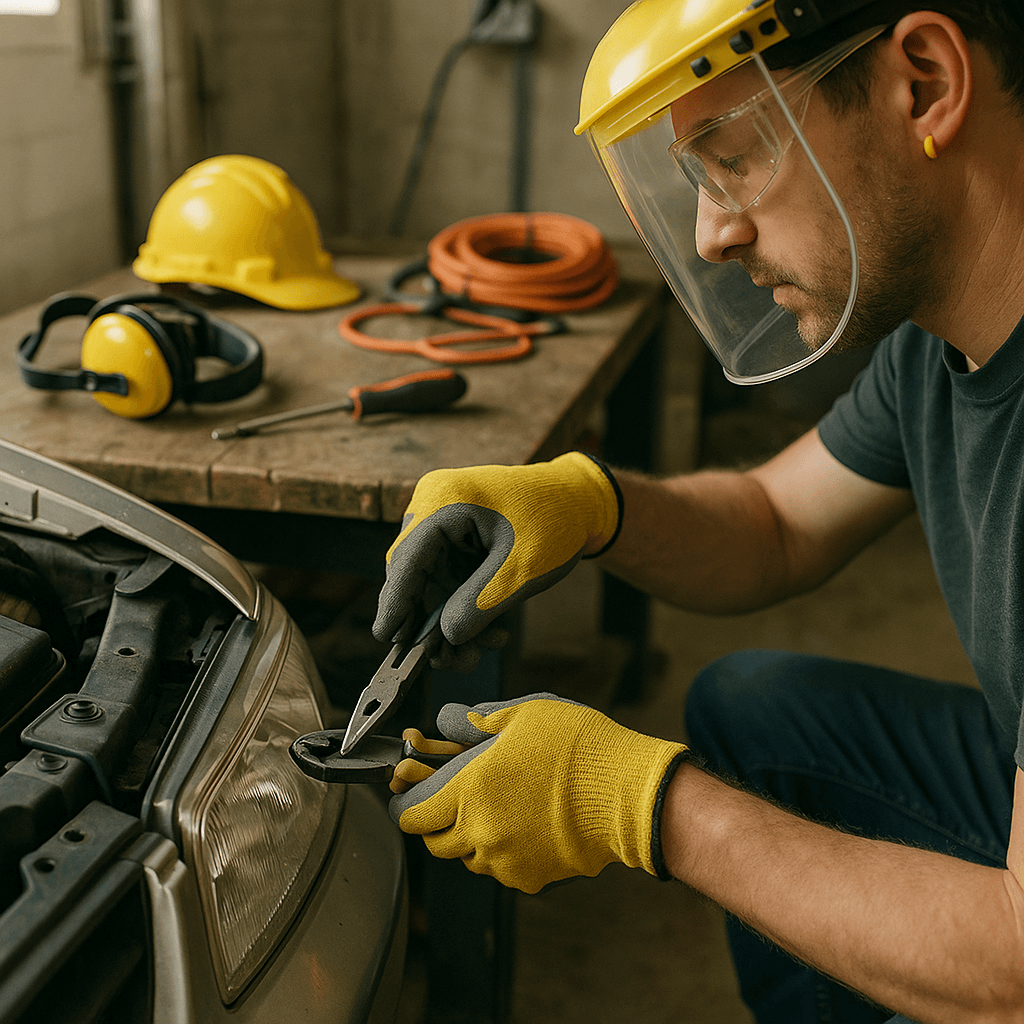
1. Gather Your Safety Gear
Before you even think about moving boxes or tools, it’s crucial to gather your safety gear. Here’s what you should have on hand:
- Safety goggles to protect your eyes from dust and debris. A pair with anti-fog features can be a lifesaver.
- Work gloves to prevent cuts and scrapes while handling materials. Look for ones with a good grip, especially if you're moving heavy bins.
- A face mask to filter out dust, especially if you’re dealing with old materials. A N95 mask is a solid choice for better filtration.
- Steel-toed boots to protect your feet from heavy objects. They’re worth the investment when you’re constantly lifting and moving around.
- Ear protection if you’re using power tools. Simple foam earplugs work well, but I prefer earmuffs for longer tasks.
- A first aid kit for any minor accidents that might occur. Make sure it’s stocked with band-aids, antiseptic wipes, and gauze.
Why this matters: Having the right safety gear on hand not only protects you but also boosts your confidence as you work. You’ll be able to focus on the task instead of worrying about potential injuries.
2. Plan Your Organization Strategy
Before you dive into moving things around, take a moment to plan how you want to organize your space. Consider these factors:
- What items do you use most often? Keep those at eye level.
- Are there any zones in your space that can be optimized? For instance, create a dedicated tool zone versus a seasonal storage area.
- What storage solutions will work best for your items? Assess whether bins, shelves, or pegboards suit your needs.
Sketch out a rough layout on paper or use a free online design tool. I’ve found that visualizing the space helps prevent mistakes later on. Trust me, the first time I organized my garage, I didn’t plan, and I ended up moving things three times!
3. Clear the Area
Now it’s time to clear the area you want to organize. Start by removing everything from the space, and as you do, wear your gloves and goggles. Dust and hidden hazards can be lurking in corners. This will give you a blank canvas to work with.
4. Clean and Inspect
With everything out of the way, it’s time to clean the area. Sweep up cobwebs, dust, and debris. Inspect the space for any damage, like water stains or mold, which might need addressing before you put everything back. Using a disinfectant cleaner can also help keep your space fresh, especially in winter when everything feels a bit musty. I like to use a simple vinegar solution—it's effective and safe.
5. Sort and Categorize
As you clean, start sorting your items into categories. This can include:
- Tools
- Seasonal decorations
- Garden supplies
- Miscellaneous items (to be dealt with later)
I’ve found that labeling boxes or bins can save a ton of time down the road. Just make sure your labels are clear and visible!
6. Choose Storage Solutions
Now that you have a clear idea of what you’re working with, it’s time to choose your storage solutions. Here are some examples:
- Shelving units for tools and bins. Adjustable shelves are great for flexibility.
- Clear plastic bins for small items. I personally love the stackable ones for saving space.
- Hooks and pegboards for tools, which keep them off the ground and easily accessible. Make sure they're securely anchored to the wall.
- Overhead storage for seasonal items, keeping them out of the way but still easy to access. Just ensure you can safely lift items overhead.
7. Implement Your Plan
With your storage solutions ready, it’s time to put everything back in its designated spot. Follow your plan, and don’t be afraid to tweak it as you go. Sometimes things don’t fit quite as you imagined, and that’s okay! Just adjust as needed.
8. Final Safety Check
Before you call it a day, do a final safety check. Ensure that heavy items are stored low to the ground and that everything is stable and secure. Remove any hazards like loose cords or sharp edges. Consider using cord organizers to keep everything tidy. Remember, a safe workspace is a productive workspace!
Troubleshooting & Fix-ups
Even with the best plans, things can go sideways. Here are some common issues I’ve encountered and how to fix them:
- Overloaded shelves: Make sure you’re not putting too much weight on any shelf. If a shelf starts to sag, redistribute the weight. Use brackets or reinforcements if necessary.
- Items falling off hooks: If tools are slipping off hooks, consider upgrading to heavier-duty hooks or adding rubber grips to keep them secure.
- Bins not fitting: If your bins aren’t fitting into your shelving as planned, double-check the measurements. It’s easy to misjudge dimensions, especially when you’re in the thick of organizing!
- Dust accumulation: If you find dust building up quickly, consider investing in a small air purifier for the space. It’s a game-changer for keeping your area clean.
Common Mistakes & How to Avoid Them
I’ve seen many DIYers make the same mistakes over and over again. Here’s how you can avoid them:
- Skipping safety gear: This is a big one. Always wear your safety gear, even if you think you’re just doing a quick task. You never know when an accident might happen.
- Not measuring before buying storage: Always measure your space and your items before purchasing storage solutions. Bring a tape measure with you to the store if needed!
- Ignoring weight limits: Be mindful of the weight limits on shelves and storage bins. Exceeding these can lead to accidents and damage. If unsure, consult the product specifications.
- Not labeling bins: Trust me, you’ll forget what’s in each bin if you don’t label them. Take the extra step to ensure you know where everything is.
- Overcomplicating the layout: Keep your organization simple. If a layout is too complicated, you’ll find yourself frustrated and less likely to maintain it.
Pro Tips & Lessons Learned
Through my many DIY projects, I’ve gathered some handy tips that can save you time and money:
- Buy in bulk: If you need storage bins or shelves, consider buying in bulk. It often saves money, and you’ll have extras on hand for future projects.
- Use clear bins: They allow you to see what’s inside without opening every container. This makes finding items quicker and easier.
- Plan for future growth: Leave room for new items as you acquire them. You might not have the same tools or decorations in a year, so keep your layout flexible.
- Invest in quality items: Sometimes, spending a bit more on quality storage solutions pays off in the long run. They’ll last longer and perform better.
- Host an organizing party: Get friends in on the fun! Not only is it more enjoyable, but you can share tools and ideas. A little camaraderie can make the task feel lighter.
Budget & Time Signals
When budgeting for your project, here are some realistic ranges to keep in mind:
- Safety gear: Expect to spend around $50-$100 for a basic set, depending on what you already own.
- Storage solutions: This can range widely, from $100 for basic bins and shelves to $500 or more for high-quality, custom solutions.
- Time investment: Organizing a garage or workspace can take anywhere from a few hours to a full weekend, depending on the size and complexity.
Costs can drive up if you opt for specialty storage solutions or if you have to replace damaged items. On the flip side, you can phase your project, tackling one section at a time to spread the cost over several weeks.
When to Call a Pro
Certain situations should send you running for a professional:
- If you’re dealing with structural issues in your garage or workspace that need more than just organizing.
- When you’re unsure about electrical or plumbing aspects of your DIY project.
- If you’re overwhelmed by the scope of the organization project and feel it’s too much to handle alone.
- If you’re experiencing safety hazards that you don’t feel equipped to manage.
Conclusion
You’ve made it to the end of this guide, and I hope you feel more equipped to tackle your home organization projects safely this winter! Remember, the key wins here are having the right safety gear, planning your organization strategy, and continually adjusting your approach as you go.
As a simple next step, why not take a few minutes today to gather your safety gear? It’s a small action that can set you up for success. Happy organizing, and may your projects be safe and satisfying!
Recommended Gear
Disclosure: As an Amazon Associate, we may earn from qualifying purchases at no extra cost to you.
Common Mistakes
- Skipping safety gear and risking injury.
- Not measuring space and items before purchasing storage solutions.
- Ignoring weight limits on shelves and bins causing damage or accidents.
- Failing to label storage bins leading to confusion.
- Overcomplicating the organization layout making maintenance difficult.
More in Organization