Budget-Friendly Safety Gear for Tools & Gear Before the Holidays (Winter, December)
Tools Needed
Materials Needed
Safety Tips
- Always wear your safety gear, even for small or quick tasks.
- Ensure your safety gear fits properly to maintain protection and comfort.
- Maintain your gear by checking for damage and cleaning or replacing parts as needed.
- Use anti-fog sprays or ventilated glasses to prevent fogging during work.
- Upgrade hearing protection if noise levels exceed your current gear’s rating.
- Apply non-slip coatings to boots or choose boots with good traction.
Budget-Friendly Safety Gear for Tools & Gear Before the Holidays
As the holiday season approaches, many DIYers ramp up their projects for gift-making, home improvement, and seasonal decorations. However, with all the excitement, it’s easy to overlook one critical aspect of any DIY endeavor: safety. The first time I dove into a serious woodworking project, I didn’t think much about safety gear. I ended up with a nasty splinter and a few close calls with power tools. It taught me that being prepared with the right safety gear not only protects you but also allows you to focus on your project instead of worrying about accidents.
This guide is for anyone looking to tackle DIY projects during the winter months and wants to ensure they are equipped with budget-friendly yet effective safety gear. You might be wondering, why is safety gear so important? Well, accidents can happen in the blink of an eye, and having the right protective equipment can make all the difference. Plus, investing wisely in safety gear doesn’t have to break the bank. Let’s dive in and explore how you can gear up for your upcoming projects while keeping within your budget.
Method Overview
When it comes to safety gear, the approach is straightforward: focus on the essentials that protect your eyes, ears, hands, and lungs. We’ll cover the must-have items, why they work, and when you might need to go beyond the basics. Here’s the kicker: while basic gear is great for everyday projects, certain tasks may require specialized equipment. For example, if you’re working with hazardous materials like paint strippers or doing heavy demolition, you’ll need to step up your safety game.
This method works because safety gear creates barriers between you and potential hazards, reducing the risk of injury. However, it’s not always a good fit if you’re relying solely on gear without understanding how to use it properly. Remember, gear is only effective when used correctly and consistently!
Deep Step Detail
1. Assess Your Projects
Before you purchase anything, take a moment to consider the projects you’ll be undertaking. Will you be sanding wood? Using power tools? Painting? Each task has different safety requirements. Write down your planned projects, and think about the specific risks associated with each one. The first time I did this, I realized I needed different gear for painting vs. using my circular saw.
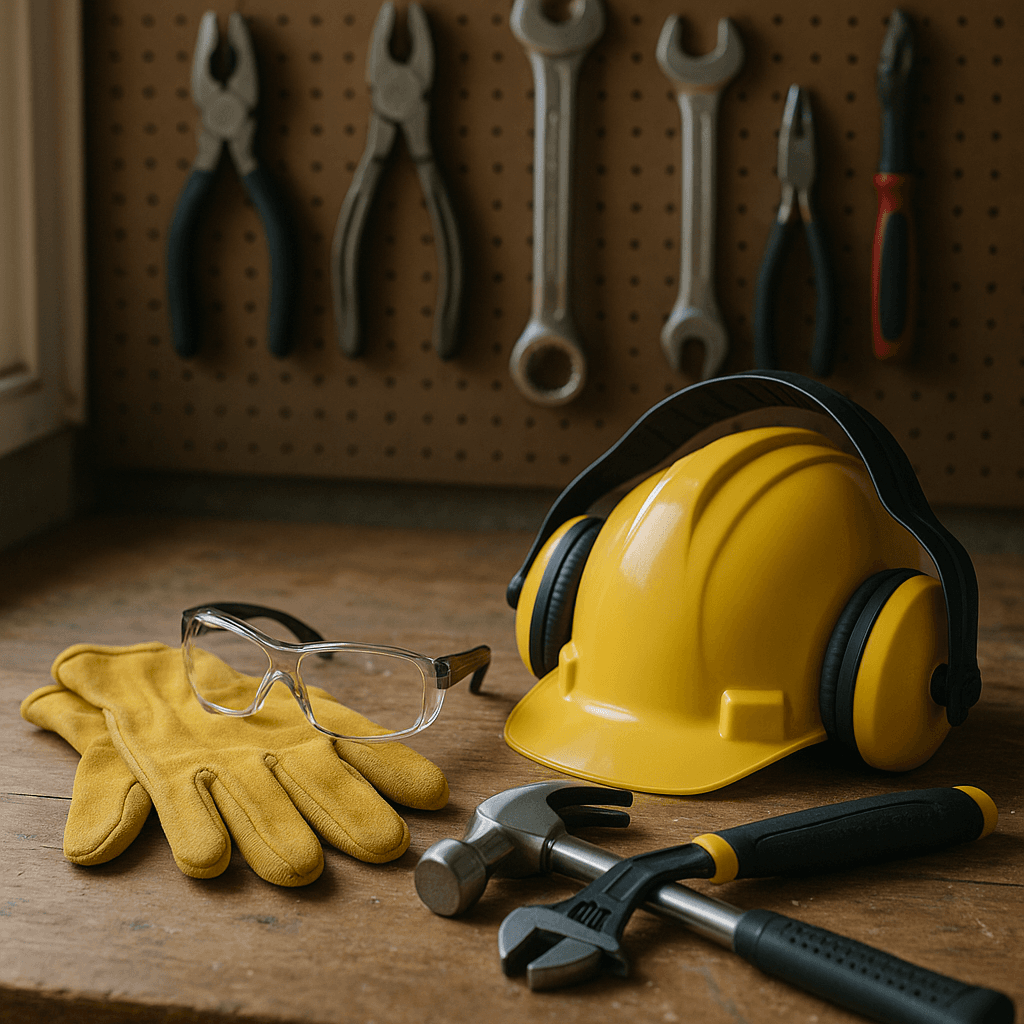
2. Gather Basic Safety Gear
Once you’ve assessed your projects, it’s time to gather some basic gear. Here’s what I recommend:
- Safety glasses: Protect your eyes from debris. Look for ANSI-rated lenses for impact resistance—trust me, it’s worth it after a few wood chips fly your way.
- Hearing protection: Foam earplugs or earmuffs can help protect your hearing from loud power tools. I prefer earmuffs since they’re more comfortable during long sessions.
- Work gloves: Choose gloves that fit well and offer protection without sacrificing dexterity. Leather gloves are great for woodworking, while nitrile gloves are best for painting or handling chemicals.
- Dust mask or respirator: A simple dust mask can work for light sanding, but a respirator is essential for tasks involving hazardous materials or fine particles. I learned this the hard way while painting without proper ventilation.
- Steel-toed boots: Protect your feet from heavy items or tools that might fall. I’ve dropped a few things in my day, and I’m thankful for my sturdy boots!
3. Shop Smart for Budget Gear
When I first started, I made the mistake of thinking safety gear had to be expensive to be effective. That’s not true! Look for sales, check online marketplaces, and consider store brands that meet safety standards. Many local hardware stores have great budget options, especially during the holiday season when they want to clear out inventory. I once found a solid set of safety gear at my local Home Depot during a clearance event.
4. Customize Your Gear
Sometimes, off-the-shelf gear doesn’t fit just right. I’ve found that taking the time to customize my gear can enhance comfort and safety. For example, adjusting the straps on a respirator for a snug fit can make a huge difference in how well it protects you. If your gloves are too big, they might slip and expose your hands to hazards. Make sure everything fits correctly and comfortably before starting your projects. It’s also a good idea to break in your gear, especially boots, before the big task.
5. Create a Safety Checklist
Before you start any project, have a checklist in place. Include items like checking your gear for wear and tear, ensuring your workspace is clear of hazards, and having a first aid kit on hand. This might seem tedious, but it’s a crucial step that can save you from accidents. I often find that taking a few minutes to prepare saves me a lot of headaches later.
Troubleshooting & Fix-ups
Even with the best safety gear, things can go sideways. Here are some common problems and how to handle them:
- Fogged glasses: If your safety glasses fog up, it can be distracting and dangerous. Consider investing in anti-fog spray or a pair of glasses with ventilation holes. I learned this the hard way while trying to sand a piece of wood, and I could barely see what I was doing.
- Uncomfortable gloves: If your gloves are too tight, it can cause hand fatigue and reduce your dexterity. Try on multiple sizes or styles before settling on a pair. If they’re still uncomfortable, consider cutting the fingertips off for better movement, but be cautious about exposing your skin.
- Dust mask irritation: If wearing a mask causes irritation, ensure it fits snugly but not too tight. If you’re doing prolonged tasks, look into a respirator with a comfortable fit and replaceable filters for better protection.
- Noise levels: If you’re using power tools and your hearing protection isn’t doing the job, check the dB rating on your earmuffs. If they’re not rated high enough, consider upgrading to a pair that provides better sound insulation. I’ve had to do this after realizing my old earmuffs didn’t cut it when using my table saw.
- Slipping boots: If your steel-toed boots are slippery, especially on wet surfaces, apply a non-slip coating or invest in a pair with better traction. Falling while carrying heavy materials can lead to significant injuries.
Common Mistakes & How to Avoid Them
In my years of DIY experience, I’ve seen many DIYers make the same blunders when it comes to safety gear. Here are some common mistakes and how to sidestep them:
- Skipping gear: Some folks think, “It’s just a quick job; I don’t need my safety gear.” This mindset can lead to injuries. Always wear your gear, even for small tasks. Accidents can happen in an instant. I once thought I could skip my goggles while drilling, and I ended up with a small piece of metal in my eye.
- Ignoring fit: Many DIYers buy safety gear without trying it on first. Always test your gear to ensure a proper fit. If it’s loose or uncomfortable, you’re less likely to wear it.
- Neglecting maintenance: Safety gear needs care, too. Check your goggles for scratches, replace worn-out gloves, and clean your respirator filters regularly. I often find that a little maintenance goes a long way in ensuring my gear works effectively.
- Overconfidence: Just because you’ve done a project before doesn’t mean you’re immune to accidents. Stay vigilant and respect the tools you’re using. I’ve learned this lesson the hard way, and it’s not fun!
- Not having a plan: Jumping into a project without a safety plan can lead to chaos. Take a few minutes to outline your project and potential hazards before you begin. This simple step can prevent a lot of headaches.
Pro Tips & Lessons Learned
Here are some smaller tricks I’ve picked up along the way that save time, money, and frustration:
- Layer your gloves: I often wear a thin pair of gloves under my work gloves for added grip and dexterity. This way, I can tackle finer tasks without sacrificing protection.
- Use a headlamp: If you’re working in dim conditions, a headlamp can be a game-changer. It keeps your hands free and allows you to see exactly what you’re doing without straining your neck. I’ve used this trick during late-night garage projects and it works wonders.
- Buy in bulk: If you have multiple projects, consider buying safety gear in bulk. For example, purchasing a box of disposable dust masks can save you money in the long run.
- Keep a safety kit: Invest in a small toolbox with first aid supplies and basic safety gear like extra gloves and a dust mask. Keeping it in your workshop means you won’t have to scramble when you need it. I’ve saved myself a lot of time by having a dedicated safety kit ready to go.
- Practice proper storage: Store your safety gear in a cool, dry place to extend its lifespan. Don’t leave it in your car or exposed to the elements, as this can degrade materials over time. I learned the hard way when my gloves cracked after being left in the garage over summer.
Budget & Time Signals
As you prepare for your DIY projects, it’s essential to have a realistic budget and timeline in mind. Here’s what to expect:
- Basic gear costs: You can find quality safety glasses for as little as $10, earmuffs around $15, and decent work gloves for $20. Budget around $100 for a full set of basic safety gear.
- Time investment: Setting aside time to shop for gear is crucial. Factor in an extra hour or two for research, trying on gear, and ensuring a proper fit. This upfront investment will pay off in peace of mind.
- Cost drivers: Prices can vary based on brand and quality. Investing in high-quality gear may cost more upfront, but it often lasts longer and provides better protection.
- Phasing projects: If you’re on a tight budget, consider phasing your projects. Work on smaller tasks first, and invest in safety gear as you go. This way, you can spread out costs without sacrificing safety.
When to Call a Pro
There are times when it’s best to put down the tools and call in a professional. Here are some clear signs that it’s time to seek help:
- Complex projects: If your project involves electrical work, plumbing, or structural changes, it’s best to consult a licensed professional. The risks are too high, and mistakes can be costly.
- Lack of experience: If you’re unsure about a task or feel overwhelmed, don’t hesitate to ask for help. It’s better to seek guidance than to risk injury or damage.
- Inability to obtain safety gear: If you can’t afford the necessary safety gear to complete a project safely, it’s a good idea to wait until you can. Safety should always come first.
- Health concerns: If you have respiratory issues or any other health concerns that might be exacerbated by your project, it’s wise to consult a pro who can navigate those risks for you.
- Time constraints: If you’re on a tight deadline and don’t have the time to do the job safely, it might be best to hire someone who can get it done efficiently.
Conclusion
As you gear up for your DIY projects this holiday season, remember that safety should always be a top priority. By arming yourself with the right safety gear and knowledge, you’ll reduce the risk of accidents and focus on what matters most: creating and enjoying your projects. Take the time to assess your needs, gather your gear, and practice good safety habits. You’ll thank yourself later!
So, what’s the next step? Take a few minutes today to make a list of the projects you’d like to tackle, and start researching the safety gear you’ll need. You’ll be well on your way to a safe and productive DIY season!
Recommended Gear
Disclosure: As an Amazon Associate, we may earn from qualifying purchases at no extra cost to you.
Common Mistakes
- Skipping safety gear because the task seems quick or simple.
- Purchasing gear without trying it on for proper fit.
- Neglecting maintenance of safety equipment leading to reduced effectiveness.
- Being overconfident and ignoring safety precautions based on past experience.
- Starting projects without a safety plan or checklist.
)