Complete Checklist for Garage Upgrades for Smart Home & AI DIY Your Neighbors Will Notice (Winter, December, Year-End)
Materials Needed
Safety Tips
- Protect network credentials with strong, unique passwords.
- Enable two-factor authentication when available.
- Turn off power at the circuit breaker before working on electrical components.
- Use a stable ladder and have assistance when installing devices at height.
Complete Checklist for Garage Upgrades for Smart Home & AI DIY Your Neighbors Will Notice (Winter, December, Year-End)
Upgrading your garage with smart home features can be a rewarding DIY project. Not only does it enhance your home’s functionality, but it also adds value and impresses your neighbors with the latest tech. With a bit of planning and elbow grease, you can tackle this project without breaking the bank.
Quick Answer
To upgrade your garage with smart home features, focus on installing smart lighting, smart garage door openers, and security cameras. Opt for devices that easily integrate with your existing home automation system to create a seamless experience.
Experience Context
When I first decided to smarten up my garage, excitement quickly turned to hesitation. I dove in, eager to connect my new smart garage door opener, only to realize I had picked the wrong voltage. That mistake cost me a few hours and a trip back to the store. Ultimately, I prioritized smart lighting, which turned out to be a game-changer for my garage’s ambiance and functionality.
Before You Start
Before diving into your upgrades, keep these key points in mind:
- Existing Wiring: Understand your current wiring setup. Some new devices might require specific wiring to function properly.
- Network Strength: Many smart devices rely on Wi-Fi. Ensure your garage has a strong signal, or plan to install a Wi-Fi extender.
- Weather Considerations: If you live in a region with extreme weather, ensure that devices are rated for outdoor use if they’ll be exposed to the elements.
Method Overview
Break the project into manageable phases:
- Planning: Decide on the smart devices based on your needs and budget.
- Wiring Assessment: Check your existing wiring and make adjustments if necessary.
- Installation: Install devices step-by-step, following the manufacturer’s instructions.
- Integration: Connect devices to your home automation system.
This method isn’t for you if you’re uncomfortable with basic electrical work or if your garage has significant structural issues. In those cases, consulting a professional is advisable.
Deep Steps
Here’s a step-by-step guide to upgrading your garage:
- Plan Your Layout
- Decide where to install smart lighting, sensors, and cameras. Sketch it out on graph paper or an app.
- Choose Devices
- Smart Lighting: Look for LED smart bulbs compatible with your smart home ecosystem (e.g., Philips Hue, LIFX).
- Smart Garage Door Opener: Choose a model like the Chamberlain MyQ for remote access.
- Security Cameras: Consider a system like Ring or Arlo for easy integration and remote monitoring.
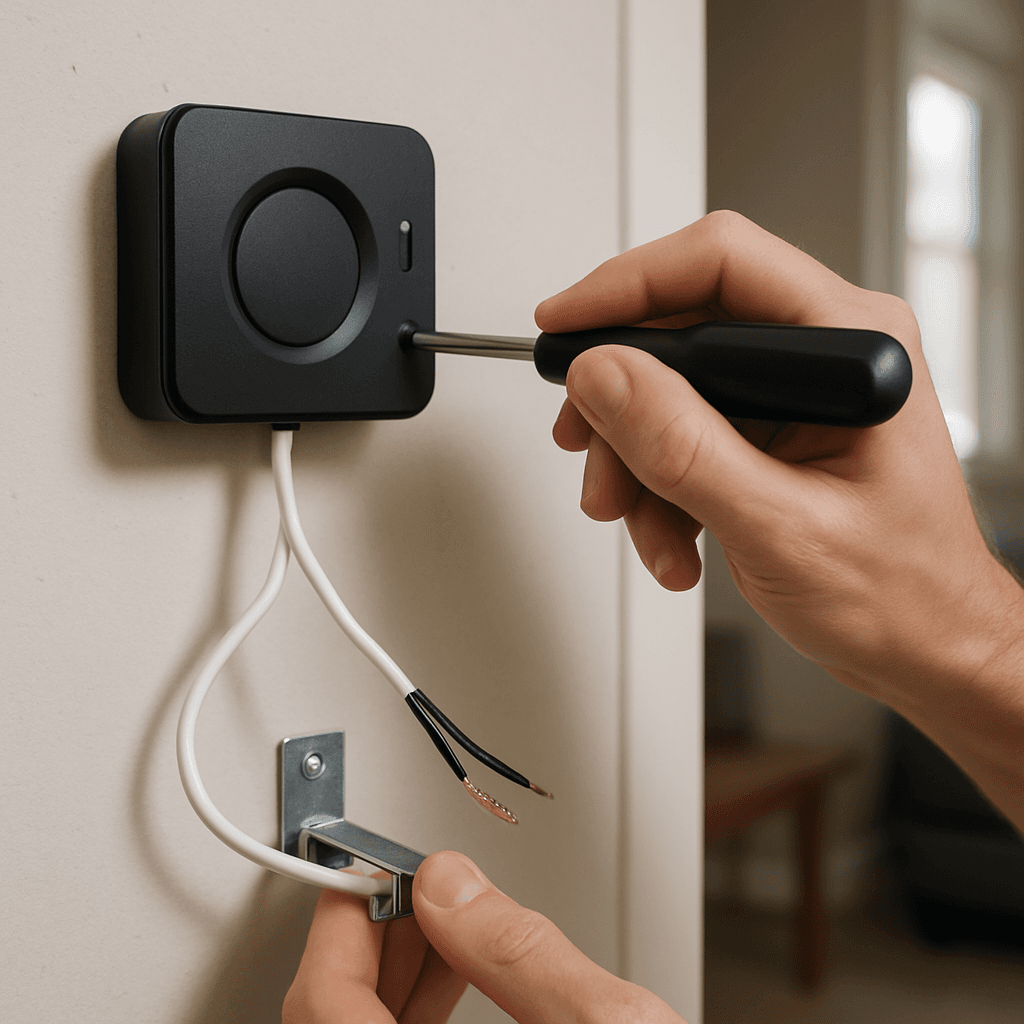
- Check Your Wiring
- Ensure you have the right electrical setup. Use a multimeter to check voltage and continuity. If you find outdated wiring, consider upgrading to meet current safety standards.
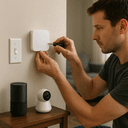
- Install Smart Lighting
- Replace existing bulbs with smart bulbs. Follow the instructions to connect them to your Wi-Fi and set up routines.
- Install the Smart Garage Door Opener
- Follow the manufacturer’s instructions closely. If you encounter issues, refer to the troubleshooting section below.
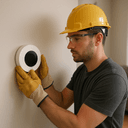
- Set Up Security Cameras
- Mount cameras at strategic locations. Confirm they’re connected to a power source and the Wi-Fi network. Run a test to ensure they function correctly.
- Integrate with Home Automation
- Connect all devices to your home automation hub. Use apps to create routines, such as turning on lights when the garage door opens.
Decision Points
While upgrading my garage, I faced several choices:
- Smart Lighting vs. Security Cameras: I prioritized smart lighting first for its lower cost and immediate impact. Security cameras could wait until I had more budget.
- DIY Installation vs. Professional Help: I chose to install everything myself to save money. If you’re not comfortable with electrical work, hiring a professional can be a wise investment.
- Battery-Powered Cameras vs. Wired: I opted for wired cameras for durability. Battery-powered ones would require more maintenance.
- Wi-Fi Extender vs. New Router: I initially thought about a new router but settled on a Wi-Fi extender for cost-effectiveness and simplicity.
Troubleshooting & Fix-Ups
Even with the best planning, issues can arise. Here are common problems and how to fix them:
- Problem: Smart bulbs won’t connect to Wi-Fi.
- Fix: Ensure your router is within range and restart both the router and the bulb. If it still fails, reset the bulb by turning it on and off until it blinks.
- Problem: Garage door opener doesn’t respond.
- Fix: Check the power supply and compatibility with your smart device. If issues persist, consult the manual for troubleshooting steps.
- Problem: Security camera footage is lagging.
- Fix: Ensure a strong Wi-Fi signal. Reposition the camera closer to the router if needed or consider upgrading your router.
- Problem: Smart devices lose connection frequently.
- Fix: Update the firmware on your devices and router. If issues continue, consider setting up a dedicated network for smart devices.
Common Mistakes & How to Avoid Them
Here are pitfalls I encountered and tips to avoid them:
- Rushing the Planning Stage: Take your time to carefully plan your layout and devices.
- Ignoring Compatibility: Ensure all devices work with your existing automation system to avoid integration headaches later.
- Overlooking Security: Protect your network credentials during setup to avoid hacking risks.
- Skipping Testing: Always test devices after installation to ensure they work before moving on to the next step.
Safety Tips
Prioritize safety when tackling DIY projects:
- Protect Network Credentials: Use strong, unique passwords for all smart devices.
- Follow Device Pairing Security Best Practices: Enable two-factor authentication whenever available.
- Electrical Safety: Turn off power at the circuit breaker before working on electrical components.
- Proper Ladder Use: Use a stable ladder and have a partner assist when installing devices at height.
Budget & Time Ranges
The cost and time for your garage upgrade can vary based on:
- Device Choices: High-end devices increase costs significantly.
- Wiring Needs: Upgrading wiring can add both time and expense.
- DIY vs. Professional Help: Hiring a professional can double or triple costs but may save time and frustration.
- Permits: Check local regulations; you may need permits for certain installations, adding time and cost.
Stop & Call a Pro
Know when to bring in a professional. Consider these thresholds:
- Electrical Issues: If you find outdated wiring or inconsistent power, stop and call an electrician.
- Structural Concerns: Consult a contractor if your garage has major structural issues.
- Complex Installations: If you’re unsure about complex installations or integrations, it’s safer to call a pro.
- Persistent Problems: If devices fail to connect or function correctly after several attempts, it’s best to seek professional help.
What I’d Do Differently If I Did This Again
Reflecting on my upgrade process, here’s what I’d change:
- Skip Unnecessary Step: I wouldn’t test every single device before installation; I’d do it afterward for efficiency.
- Earlier Step: Assess my Wi-Fi strength before selecting devices to avoid connectivity issues.
- Tool Upgrade: Invest in a better multimeter for more accurate readings during wiring checks.
- Surprise: I underestimated how much time integration would take. I’d set aside a full day for that part of the project.
Upgrading your garage for smart home integration can be an exciting endeavor. With proper planning and execution, you can enhance your space significantly. Prioritize safety, do your research, and don’t hesitate to call in a professional if needed. Happy DIYing!
Recommended Gear
Disclosure: As an Amazon Associate, we may earn from qualifying purchases at no extra cost to you.
Common Mistakes
- Rushing the planning stage without careful layout and device selection.
- Ignoring device compatibility with existing home automation systems.
- Overlooking network security during device setup.
- Skipping testing devices after installation.
)