Ultimate Tool Kits for Beginner DIY Guides that Save Time and Money (Winter, December)
)
Tools Needed
Materials Needed
Safety Tips
- Always turn off the water supply before starting any plumbing repairs.
- Handle tools carefully to avoid injury.
- Keep your workspace organized to prevent accidents.
- Wear gloves if necessary to protect your hands.
Tackling the Leaky Faucet
Last December, I decided to tackle a leaky faucet in my kitchen. I thought I could just replace the washer, but when I took it apart, I realized I had no idea which part went where. Frustrated, I almost gave up, doubting my DIY skills. I had to make a tradeoff: either spend $100 on a plumber or invest a few hours learning online. I chose the latter, watched a couple of videos, and found out I had installed the wrong size washer. After getting the right one from the hardware store for $5, I fixed it in under an hour. The whole ordeal cost me an afternoon, but I saved a lot of money and learned something valuable.
The First Steps
The first time I tried this, I was overwhelmed by the number of tools and parts. I gathered my adjustable wrench, screwdrivers, and plumber's tape, feeling like a pro. But the moment I started disassembling the faucet, I felt a wave of panic as I discovered I had no idea which part went where. It’s easy to think you can remember everything, but trust me, labeling or photographing parts can save a lot of headaches.
Decision Time
As I stood there, contemplating the next steps, I faced a critical decision: spend $100 on a plumber or learn how to fix it myself. I chose the latter. I wanted to save money and gain experience. My first instinct was to rush to the phone, but there was something empowering about taking on the challenge myself.
Learning Curve
What caught me off guard was how much I didn’t know. I had assumed all washers for faucets were the same size, only to find out that each faucet can have unique requirements. After some online research, I learned about the various types of washers and how to identify what my faucet needed. I didn’t realize until halfway through that I had installed the wrong size washer when I attempted my first fix. This was a pivotal moment; the frustration could have easily led me to give up.
The Fix
After watching a couple of tutorials, I finally felt ready to head to the hardware store. Armed with the old washer, I confidently walked in, hoping to find a match. It took me a few minutes to locate the right section, and I was surprised by how many options there were. Eventually, I found the right size washer for just $5.
Reassembly was straightforward, but I had to stay focused to avoid mixing up parts. Each piece had its place, and I reminded myself that I had to keep everything organized. Once the new washer was in place, I carefully reassembled the faucet. I used plumber's tape on the threads, which I learned is crucial for preventing leaks.
Final Steps
Finally, I turned the water supply back on slowly, holding my breath. As water flowed through, I felt a rush of relief when I noticed there were no leaks. I tested the faucet thoroughly, and to my delight, it was fixed! This experience taught me the value of patience and persistence.
What I’d Do Differently
- I would take photos during disassembly to remember the order of parts better.
- I’d gather all necessary tools before starting to avoid interruptions.
- I’d ask a friend to help, making the process more enjoyable.
- I would research different types of faucets beforehand to be better prepared.
Conclusion
Taking on that leaky faucet was a journey that taught me more than just plumbing skills. I saved a lot of money and learned something valuable. Next time I face a home repair, I’ll approach it with more confidence, knowing that I can figure it out. If I can tackle a leaky faucet, I can handle just about anything that comes my way!
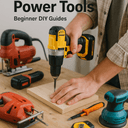
Understanding Your Tools
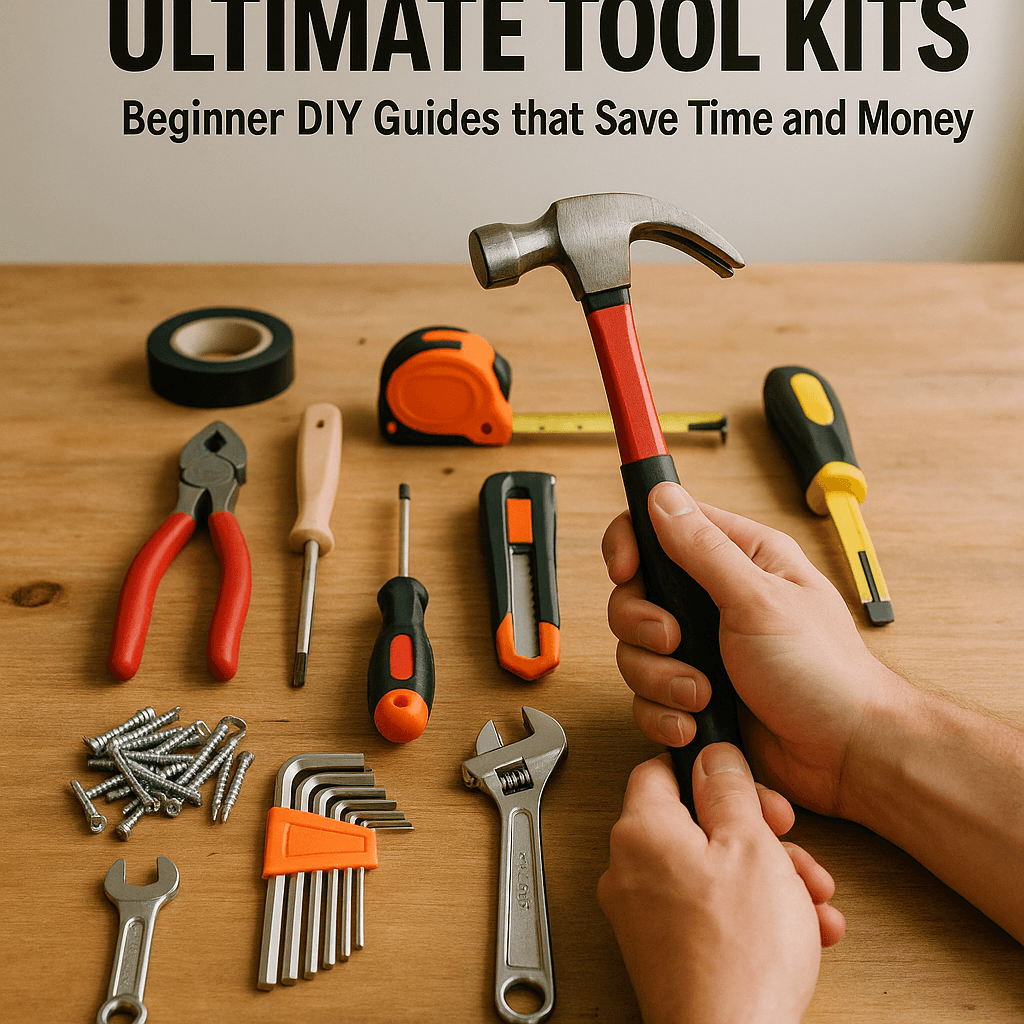
Essential Tools for Beginners
When embarking on your DIY journey, it's crucial to have the right tools on hand. For beginners, consider investing in the following essential tools:
- **Adjustable Wrench**: Perfect for gripping and turning nuts and bolts of various sizes.
- **Screwdriver Set**: Both Phillips and flathead screwdrivers in various sizes are essential for different types of screws.
- **Pliers**: Needle-nose pliers can help grip small objects and pull out nails.
- **Utility Knife**: Useful for cutting through various materials, from cardboard to more robust items.
- **Tape Measure**: Accurate measurements are critical; a 25-foot tape measure is a good starting point.
- **Level**: Ensures that your projects are straight and properly aligned.
- **Drill**: A power drill can make your job much easier, especially for creating holes or driving screws into tough materials.
- **Safety Gear**: Don’t forget safety goggles and gloves to protect yourself during your projects.
Organizing Your Tools
Once you have your tools, it's important to organize them effectively. A cluttered workspace can lead to mistakes and frustration. Here are a few tips:
- **Toolbox or Organizer**: Invest in a toolbox or organizer to keep your tools accessible and tidy.
- **Labeling**: Label drawers or compartments based on tool types to quickly find what you need.
- **Regular Maintenance**: Regularly check and clean your tools to ensure they remain in good working condition.
Learning the Basics
Online Resources and Tutorials
Before diving into a project, familiarize yourself with what you’re about to undertake. There are countless online resources available:
- **YouTube Channels**: Channels dedicated to DIY projects often provide step-by-step guides.
- **DIY Websites**: Websites like DIY Network and Family Handyman offer articles and videos on various repairs and projects.
- **Community Forums**: Joining online forums can provide support from experienced DIYers who can answer your questions.
Practice Projects
Before tackling significant projects, practice on smaller tasks to build your confidence. Here are a few ideas:
- **Hanging a Picture Frame**: Practice measuring and leveling by hanging a frame. It’s a simple task that teaches you about precision.
- **Changing a Light Bulb**: While it seems basic, understanding how to safely change a bulb prepares you for more complex electrical work.
- **Assembling Furniture**: Many furniture pieces from stores come with assembly instructions. This is a good way to practice using tools while following directions.
Tackling the Faucet Leak
Step-by-Step Guide to Fixing the Faucet
- **Gather Your Tools**: Make sure you have your adjustable wrench, screwdrivers, and replacement washers.
- **Turn Off the Water Supply**: Locate the shut-off valves under the sink and turn them clockwise to stop the water flow.
- **Disassemble the Faucet**: Use the appropriate screwdriver to remove any screws and carefully take apart the faucet. Keep track of the order of parts.
- **Identify the Problem**: Inspect the washers and O-rings. If they look worn or damaged, they need replacing.
- **Purchase the Correct Parts**: Take the old washers to the hardware store to ensure you get the right size.
- **Reassemble the Faucet**: Carefully put the faucet back together in the order you disassembled it. Make sure to tighten screws securely but avoid overtightening.
- **Turn On the Water Supply**: Slowly turn the water supply back on and check for leaks.
- **Test the Faucet**: Turn the faucet on and off to ensure it operates correctly.
Common Mistakes and Fixes
- **Incorrect Washer Size**: If a leak persists, you may have installed the wrong size washer. Double-check your measurements.
- **Not Tightening Screws Properly**: Loose screws can lead to leaks. Ensure all screws are snug but not over-tightened.
- **Ignoring O-rings**: Sometimes O-rings are the culprits for leaks. If your faucet continues to leak, check these as well.
Expanding Your Skills
Advanced DIY Projects
Once you feel confident with basic repairs like the leaky faucet, consider expanding your skills:
- **Installing a New Faucet**: After mastering repairs, learn how to install a new faucet from scratch. This includes disconnecting the old faucet and properly connecting the new one.
- **Painting a Room**: Painting can transform a space. Learn about surface preparation, choosing the right paint, and techniques for even application.
- **Building Simple Furniture**: Start with straightforward projects like a small shelf or a coffee table. Learn about woodworking and joinery techniques.
Scenario Callbacks
- **"I thought I could just replace the washer"**: This thought often leads to underestimating the problem. Always assess the situation fully before starting any repairs.
- **"I almost gave up, doubting my DIY skills"**: It’s normal to feel overwhelmed. When faced with a challenge, take a break, and revisit the problem with a fresh mind.
- **"I saved a lot of money and learned something valuable"**: Each project is a learning experience. Reflect on what you learn to build confidence for future tasks.
Decision Points
When to Call a Professional
While DIY can save money, there are times when calling a professional is the best choice:
- **Complex Plumbing Issues**: If you encounter multiple leaks or issues within your plumbing system, it may be best to consult a licensed plumber.
- **Electrical Work**: If a project involves wiring or circuit breakers, it's safer to hire an electrician.
- **Structural Changes**: Projects that involve load-bearing walls or structural elements should be left to professionals.
Evaluating Your Skills
Before starting a new project, evaluate your skills and comfort level:
- **Research the Project**: Understand what tools and skills are needed. If you feel unsure, consider starting with a simpler project.
- **Ask for Help**: Don’t hesitate to ask friends or family members with more experience to assist you. Learning from others can be invaluable.
- **Set Realistic Goals**: Be honest about what you can achieve in a given timeframe. Break larger projects into manageable steps to avoid feeling overwhelmed.
Conclusion
Embarking on DIY projects can be both rewarding and challenging. With the right tools, knowledge, and mindset, you can tackle various tasks around your home, saving time and money while gaining valuable skills. Embrace the learning process, and remember that every mistake is an opportunity for growth.
Recommended Gear
Disclosure: As an Amazon Associate, we may earn from qualifying purchases at no extra cost to you.
Common Mistakes
- Not labeling or photographing parts during disassembly, leading to confusion during reassembly.
- Assuming all washers are the same size and installing the wrong one.
- Skipping the use of plumber's tape, which can cause leaks.
- Rushing the reassembly process and mixing up parts.
More in Beginner Guides