Expert Tips for Organization Must-Haves for Smart Home & AI DIY for Indoor and Outdoor Use (Winter, November)

)
Tools Needed
Materials Needed
Safety Tips
- Always turn off power before installing wired devices.
- Use a voltage tester to confirm no electrical current is present before handling wiring.
- Read and follow manufacturer instructions carefully.
- Secure your network with strong passwords and enable two-factor authentication.
- Be cautious when using ladders or working outdoors.
Before You Start / What to Know Up Front
Welcome to the exciting world of smart home DIY! If you're here, you're likely looking to enhance your living space with smart devices that make life easier, whether you're managing your home's lighting, security, or climate control from the comfort of your couch. I remember the first time I decided to go smart; I was overwhelmed by the choices and potential complications. But with a little patience and the right guidance, it became one of the most rewarding projects I've tackled.
This guide is for anyone ready to dive into smart home integration and organization, whether you're a seasoned DIYer or just starting out. We’ll break down how to organize your smart devices, both indoors and outdoors, and ensure everything is set up for optimal performance. Keep your expectations realistic; you might hit a few bumps along the way, but I promise it’ll be worth it when you see your smart home in action.
Method Overview
Our approach focuses on strategically planning your smart home setup. This means considering not just the devices you want, but also how you will use them and where they fit best in your home. We’ll explore practical organization methods that keep your tech accessible and functional.
This method works well for most homes, especially if you’re pursuing a cohesive system that integrates smoothly. However, if you live in an older home with outdated wiring or if you’re not comfortable with basic electrical concepts, you might want to consider bringing in a professional for certain installations. The goal here is to empower you, but we also want to ensure your home remains safe and functional.
Deep Step Detail
Let’s get into the nitty-gritty. Here are the steps you'll need to follow to organize your smart home effectively:
- Assess Your Needs
Begin by listing the features you want in your smart home. Consider areas like lighting, security, climate control, and entertainment. For example, do you want motion-sensing lights in your driveway or a smart thermostat to manage heating? Knowing your needs upfront will help in selecting the right devices. Most DIYers I see forget to plan for future needs, so think about how your lifestyle might change.
- Choose Your Devices Wisely
Research the devices that meet your needs. I recommend brands like Philips Hue for lighting and Nest for thermostats. Look for compatibility with platforms like Amazon Alexa or Google Assistant, which can help streamline your setup. Make sure to stay updated on security features and follow device pairing security best practices to protect your network credentials. A common mistake people make is assuming all devices will work seamlessly together—double-check compatibility before making any purchases!
- Create a Central Hub
You’ll want a central hub to manage your devices. This could be a smart speaker or a dedicated smart home hub. Setting this up first will make integrating other devices much smoother. For example, I use the SmartThings Hub, which allows me to connect various brands and control them all from one app. Just be sure to review user manuals for any unique setup requirements.
- Plan Your Layout
Think about where each device will go. For indoor setups, keep in mind that smart bulbs should be placed in fixtures that are frequently used. For outdoor devices, consider placement for optimal Wi-Fi coverage. I made the mistake of putting my outdoor cameras too far from the router, which resulted in intermittent connectivity. Remember to consider the proximity to power outlets and Wi-Fi strength when placing your devices.
- Install Devices
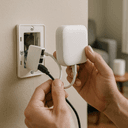
Follow the manufacturer’s instructions for each device. Most smart devices have simple installation processes. For example, smart bulbs typically just screw in like regular bulbs. But when it comes to devices that require wiring, like smart switches, make sure you turn off the power and double-check any wiring connections. Always use a voltage tester to ensure you've eliminated any electrical hazards.
- Set Up Automations
Once everything is installed, use your hub’s app to create automations. This could be setting lights to turn on at sunset or having your thermostat adjust based on your schedule. Automations are where the magic happens, and they’ll make your smart home truly smart!
Troubleshooting & Fix-ups
Even the most seasoned DIYers run into hiccups. Here are some common problems you might encounter and how to fix them:
- Device Not Connecting: If a device won’t connect to your network, first ensure you’re using the right Wi-Fi band. Many smart devices only support 2.4GHz networks. If you're on a 5GHz network, switch to 2.4GHz and try again. This is often overlooked, but it can save a lot of frustration.
- Inconsistent Performance: If your smart lights flicker or your thermostat isn’t responding, check your Wi-Fi signal strength. You might need to reposition your router or consider a Wi-Fi extender. Trust me, I’ve learned that one the hard way! Investing in a good quality router can also make a significant difference in performance.
- App Issues: Sometimes the app for your smart device may crash or not load properly. Try uninstalling and reinstalling the app, or check for updates. If the app is still acting up, consult the manufacturer's support page for troubleshooting guides. Don’t hesitate to reach out to customer service if things get tricky.
Common Mistakes & How to Avoid Them
Through my years of DIY projects, I’ve seen a few common mistakes that can lead to frustration:
- Not Reading Instructions: I get it; sometimes the excitement leads us to skip the manual. However, each device comes with specific instructions that are crucial for proper setup. Make it a habit to read through them first. It’s always good practice to refer back to the manual during installation.
- Ignoring Compatibility: Double-check that all your devices are compatible with your hub or smart assistant. I once bought a fantastic smart lock only to find out it wouldn’t connect to my existing system. Make a checklist of your devices and their compatibility before you purchase.
- Neglecting Security: Many DIYers forget about securing their network. Always use strong passwords and enable two-factor authentication where possible. Protecting your network credentials is vital to keeping your smart home safe. Don’t leave the front door open for hackers!
Pro Tips & Lessons Learned
As someone who has spent countless hours setting up smart homes, here are a few tricks that can save you time and headaches:
- Label Your Devices: Once everything is set up, label each device in your app. This makes it easier to identify which light or switch is which, especially if you have multiple devices in one area. It’s a small step that can save you a lot of time down the line.
- Keep Your Hub Updated: Regularly check for firmware updates for your hub and devices. Manufacturers often release updates that improve functionality and security. I’ve seen devices behave erratically until I updated the firmware—don’t let that happen to you!
- Use Zoning for Automations: If you have multiple rooms or areas, consider creating zones in your app. This allows you to control groups of devices more easily rather than managing them individually. For example, you can turn off all the lights in the living room with one command.
Budget & Time Signals
When planning your smart home setup, budget and time are important considerations. You can expect to spend anywhere from $100 to $1,000+ depending on how extensive your setup is. Here’s a rough breakdown:
- Basic Setup: $100-$300 for smart bulbs, plugs, and a basic hub.
- Moderate Setup: $300-$700 for smart thermostats, security cameras, and more complex integrations.
- Advanced Setup: $700+ for advanced security systems, smart locks, and full home automation systems.
Keep in mind that costs can rise with additional devices, professional installations, or if you decide to expand your systems significantly later on. Phasing your project can help manage expenses, allowing you to invest in the most important devices first.
When to Call a Pro
While many smart home projects are DIY-friendly, some situations warrant professional help. Here are a few signs that it might be time to call in an expert:
- Complicated Wiring: If you’re uncomfortable working with electrical wiring or if you need to install smart switches, it’s best to leave that to a licensed electrician. Safety should always come first. Remember, it’s okay to ask for help!
- Network Issues: If you’re consistently having trouble with your network and can’t seem to pinpoint the problem, a professional can help diagnose and resolve connectivity issues. They may have tools to test your network strength accurately.
- Extensive Integrations: For larger homes or if you’re planning on integrating multiple systems (security, HVAC, lighting), consider hiring a smart home consultant. They can help you create a seamless solution tailored to your needs. Investing in a pro can save you time and ensure everything works harmoniously.
Conclusion
Diving into the world of smart home DIY can be a thrilling adventure. You’ll not only enhance your home’s functionality but also gain new skills along the way. Remember to take it step-by-step, plan thoroughly, and don’t be afraid to ask for help when you need it.
Now that you have the tools and knowledge to start organizing your smart home, why not take a few minutes today to assess your needs? Jot down the devices you’d like to integrate and begin your journey toward a smarter, more efficient home!
Essential Hardware for Smart Organization
In the realm of smart home DIY, selecting the right hardware can make all the difference. For instance, when installing smart lights, opt for dimmable LED bulbs that are compatible with your chosen smart hub. I once installed a set of smart bulbs only to realize later they weren’t dimmable. Not only did it affect the ambiance, but I had to redo the job entirely! Always check the specifications on the packaging, and don’t assume compatibility.
Step-by-Step for Smart Light Installation
- Turn off the power at the breaker for safety.
- Remove existing bulbs and fixtures carefully.
- Install smart bulbs in a well-lit area to avoid confusion.
- Connect to your smart hub, following the app instructions closely—most apps will guide you through the setup, including setup time, which can take about 10-15 minutes.
Mini Case Study: The Wi-Fi Connection Woe
A friend of mine attempted to install a smart thermostat but didn’t realize his home’s Wi-Fi signal was weak in that area. The thermostat kept losing connection, causing frustration. The fix? A Wi-Fi extender installed halfway through his home eliminated the issue, allowing for a seamless connection.
Pro Tips for Outdoor Smart Devices
- Weatherproofing: Always ensure your outdoor devices are rated for the specific weather conditions in your area. I once had a smart irrigation controller fail after a heavy rain because I neglected to seal the connections properly. Always check the IP rating of your devices to ensure they can withstand moisture and temperature fluctuations.
- Cure Times for Sealants: If you’re using sealant on outdoor devices, remember that most silicone-based adhesives require a 24-hour curing time before exposure to moisture. Patience pays here!
Final Touch: Smart Organization with Labels
Using a label maker for organizing your cables and devices can save hours of troubleshooting down the line. I once labeled all my smart device cables by function, reducing the time it took to untangle and reconnect everything during a home rearrangement. A little organization goes a long way in making maintenance easier.
Recommended Gear
Disclosure: As an Amazon Associate, we may earn from qualifying purchases at no extra cost to you.
Common Mistakes
- Skipping reading the instructions before installation.
- Ignoring device compatibility with your hub or smart assistant.
- Neglecting network security and using weak passwords.
- Placing outdoor devices too far from Wi-Fi router causing connectivity issues.
- Assuming all devices will work seamlessly without checking compatibility.
More in Smart Home